Arduino Projects
This page will be dedicated to projects that can be made using the Arduino Uno and could potentially help during an investigation. Other boards can be used of course, but the Uno is what I use, so I will be posting projects that I have personally completed.
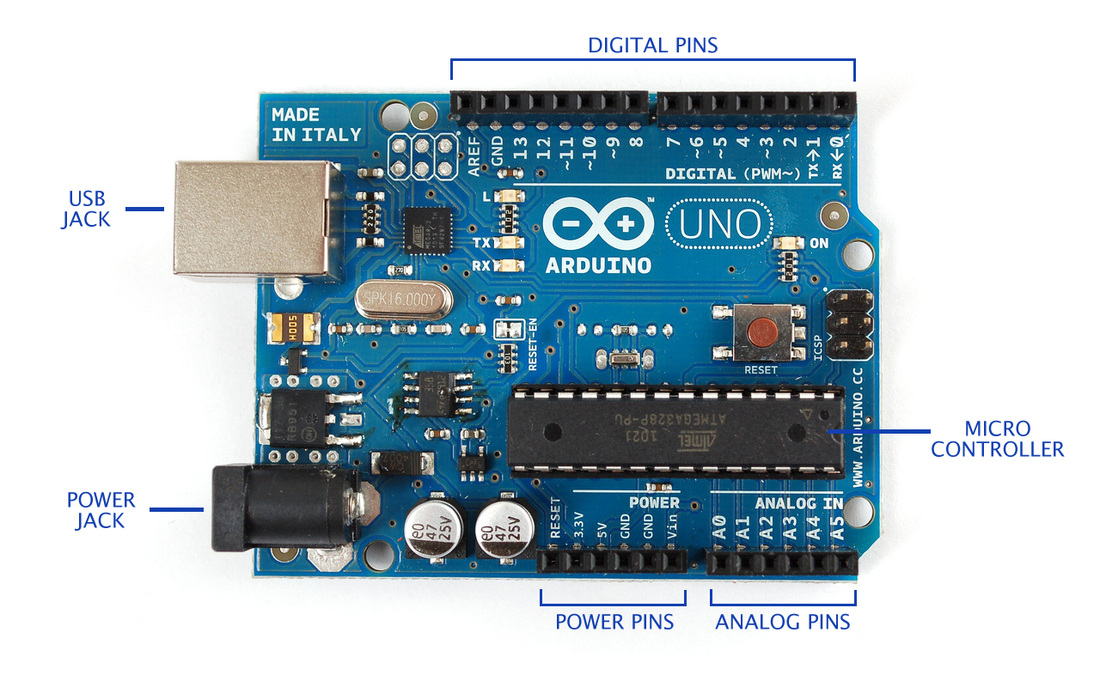
What exactly is an Arduino?
Arduino is an open-source electronics prototyping platform based on flexible, easy-to-use hardware and software. It's intended for artists, designers, hobbyists and anyone interested in creating interactive objects or environments.
What can Arduino do?
Arduino can sense the environment by receiving input from a variety of sensors and can affect its surroundings by controlling lights, motors, and other actuators. The microcontroller on the board is programmed using the Arduino programming language (based on Wiring) and the Arduino development environment (based on Processing). Arduino projects can be stand-alone or they can communicate with software running on a computer (e.g. Flash, Processing, MaxMSP).
Why should you give it a try?
Why not? Why pay for high dollar equipment when you could get the satisfaction of building it yourself for a fraction of the cost.
Arduino Uno can be purchased for around $30, so that makes it easily accessible for everyone to experiment with. The board can be purchased by itself, or in starter kits that will include a breadboard, jumper wires, usb to OTG cable, and a few components. Once you have the board, all you need to do next is download the software.
Project #1
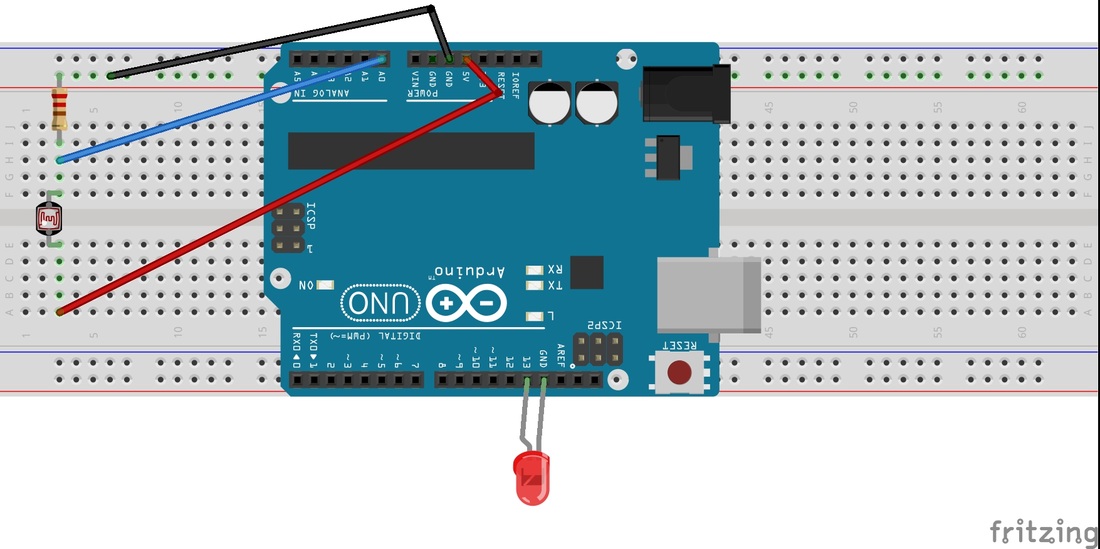
Shadow Detector
A shadow detector is actually sensing change in light and (in this project) turns on an LED when the light level drops below a set parameter. Shadow detectors seen on TV ghost hunting shows have a few predetermined settings for light sensitivity, but you have complete control over sensitivity with this project. You can adjust delay (how fast sensor reacts to light change) as well. Also, changing settings in the code can turn this into a light detector which could be used if a client has claims of light anomalies. Other possibilities with this project include adding a buzzer so you can hear it from another room, data logging, WIFI or blue tooth capabilities.....whatever suits the needs of your team.
Parts List
1x - Arduino Uno
1x - Photoresistor/LDR (Light-Dependent Resistor)
1x - 10K resistor
1x - LED (your choice of color)
3x - Jumper wires
Yep, that's it! Cost for everything...about $34....a lot cheaper than buying a shadow detection device online.
Parts List
1x - Arduino Uno
1x - Photoresistor/LDR (Light-Dependent Resistor)
1x - 10K resistor
1x - LED (your choice of color)
3x - Jumper wires
Yep, that's it! Cost for everything...about $34....a lot cheaper than buying a shadow detection device online.
Build it
The Code
Just enter this code into the Arduino program and upload it to the Arduino Uno!
| shadow_detector.txt |
Done! Place this in your own unique enclosure and now you have a functioning shadow detector with complete control over sensitivity and have the satisfaction of knowing exactly what is in your equipment and how it operates!
Project #2
FM Ghost Box
This is a fun and extremely simple project to build. This "Ghost Box" sweeps up or down through FM frequencies. It stops on each channel for a very short time (user selectable). It is believed that a spirit can use this to speak to us in real time. When your not ghost hunting, this unit also can be used as a normal FM radio, and sounds great.
This parts list assumes you already have an Arduino Uno.
Parts List
1x- FM Radio Module (mine came with the 4 wire connector)
1x- Arduino Sensor Shield (V8 is the latest version)
You will need a set of earphones to hear the radio unless you want to add external speakers. You will not need an antennae if you are using earphones as they double as an antennae while they are plugged in. I purchased these parts separately for about $21. You can also purchase a complete kit from Digital Dowsing here.
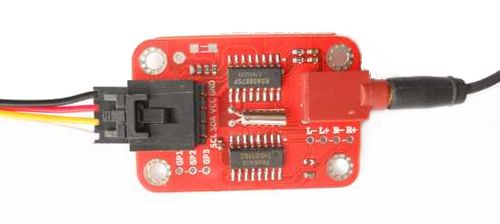
FM Radio Module
|
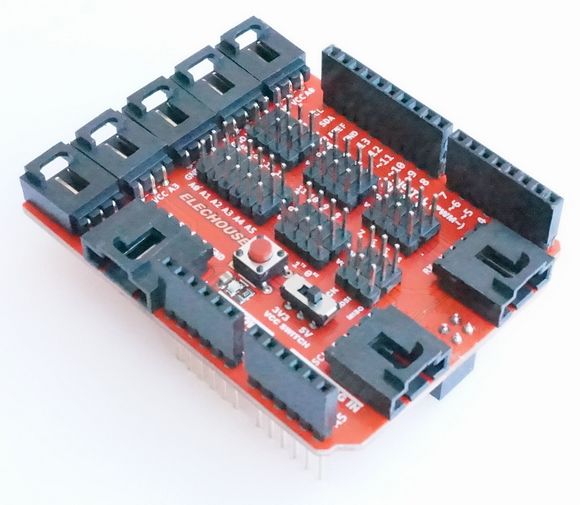
Sensor Shield V8
|
Next, it's simply a case of plug and get ready to play as shown in the pictures below.
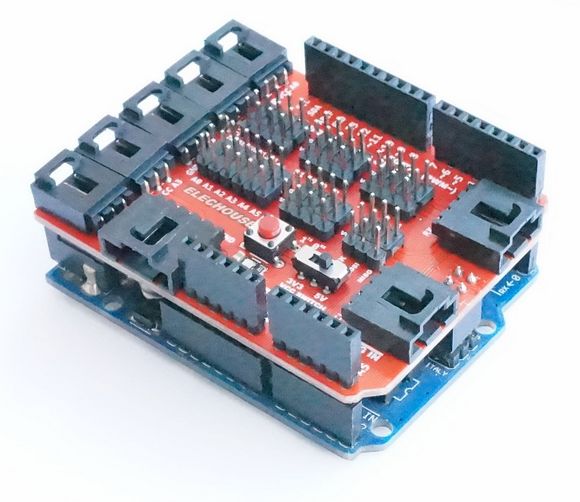
Connect Sensor Shield to Arduino
|

Connect FM Radio Module to Sensor Shield
|
The Code
This code is to use as a normal FM Radio.
This code is to use as a normal FM Radio.
| fm_radio.txt |
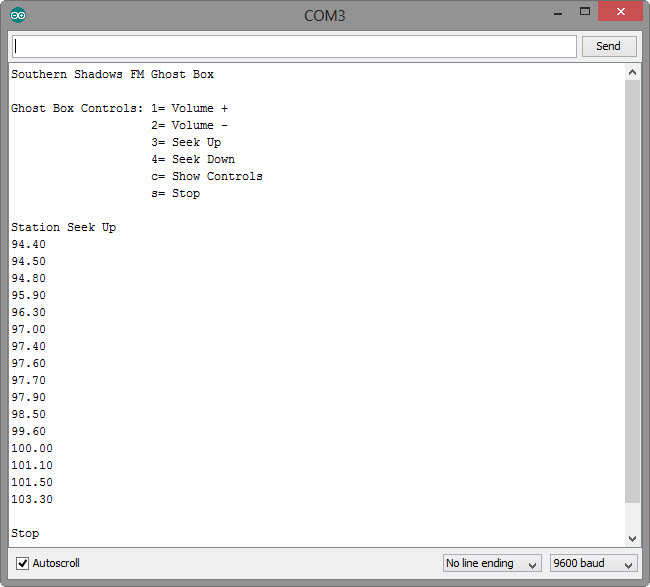
This code is what causes the radio to sweep and turn it into a "Ghost Box" provided thanks to Digital Dowsing.
| ghost_box.txt |
I modified the "Ghost Box" code to suit the needs of our team, but it will look similar to the picture below while running.